即只能在组件布局代码后,或者在组件的前面添加注释。
#注释格式:
Android的XML文件注释一般采用 <!–注释内容 –>的方式进行
在XML中,形如 <Button /> 的表示方式,其中“/>”的含义表示这个XML中没有内文,他是一个最小组成单元,也就是说他的中间不能包含其他任何< >的代码,所以在<Button />中间注释会出现错误
例如:
<?xml version=\"1.0\" encoding=\"utf-8\"?>
<!-- 在这里注释是没有问题的 -->
<TextView android:id=\"@+id/right_view1\"
 android:background=\"@drawable/yellow\" android:layout_width=\"fill_parent\"
 android:layout_height=\"wrap_content\" android:text=\"第二组第一项\" />
<!-- 在这里注释也是没有问题的 -->
<TextView android:id=\"@+id/right_view2\"
 android:background=\"@drawable/blue\"
 android:layout_width=\"fill_parent\"
 android:layout_height=\"wrap_content\"
 android:layout_below=\"@id/right_view1\" android:text=\"第二组第二项\" />
补充知识:AndroidStudio XML文件之shape标签使用详解
前言:
shape标签可以很方便的得到一些矩形、圆、椭圆、圆环,可以实现圆角、渐变,shape编写出来的资源,可以作为View的背景,减少View使用图片作为背景图的概率,从而减少apk体积,相对比图片要更节省内存,shape标签编写出来的资源一般放到drawable文件目录下。
shape标签如何使用:
shpae标签的载体是一个xml文件,一个xml里同时只能存在一个shape标签,在shape标签里声明一些属性和嵌套标签组合起来,可以得到一个视图资源,利用该资源可以填充View的属性
示例:
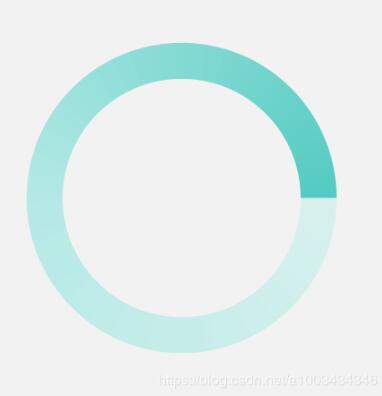
<!-- 圆环-流线型渐变 -->
<shape xmlns:android=\"http://schemas.android.com/apk/res/android\"
 android:shape=\"ring\"
 android:innerRadius=\"20dp\"
 android:thickness=\"6dp\"
 android:useLevel=\"false\">
 <size
 android:width=\"60dp\"
 android:height=\"60dp\" />

 <!--扫描渐变shape不能设置角度 #00ff0000 #80ff0000 ffff0000 -->
 <gradient
 android:centerColor=\"@color/colorCyan\"
 android:endColor=\"@color/colorGreen\"
 android:startColor=\"@color/colorCyanine\"
 android:type=\"sweep\" />
</shape>
shape标签里面的属性:
android:shape=\”XXX\”
方型:rectangle,这也是默认的形状
圆型:oval
线形:line
环形:ring,上面示例就为环形
如果android:shape=\”ring\”,以下属性定义才会生效:
android:innerRadius : 环内部(中间的孔)的半径,以dp表示
android:innerRadiusRatio : 环内部的半径,浮点型。以环宽度的比率表示。此值被 android:innerRadius覆盖。默认值为 9。
android:thickness : 环的厚度,以dp表示。
android:thicknessRatio : 环的厚度,浮点型。表示为环宽度的比率。此值被 android:innerRadius 覆盖。默认值为 3。
android:useLevel : 布尔值。如果这用作 LevelListDrawable,则此值为“true”。这通常应为“false”,否则形状不会显示。
shape标签里可以嵌套的标签:
solid标签的属性: 用于填充形状的内部颜色
android:color\”XX\”
corners标签的属性:为形状产生圆角。仅当形状为矩形时适用
android:radius : 所有角都进行圆角处理半径,如果有单独设置某个角,单独设置的优先级最高
android:topLeftRadius : 左上圆角
android:topRightRadius : 右上圆角
android:bottomLeftRadius : 左下圆角
android:bottomRightRadius : 右下圆角
padding标签的属性:内边距
android:left : 左内边距
android:top : 上内边距
android:right :右内边距
android:bottom :下内边距
size标签的属性:形状的大小,可以通过这里来设置形状大小
android:height=\”XX\”
android:width=\”XX\”
stroke标签的属性: 描边,可以是实线也可以是虚线
android:width :线宽
android:color :颜色
android:dashWidth :虚线的间距。仅在设置了 android:dashGap 时有效
android:dashGap : 虚线的厚度大小。仅在设置了 android:dashWidth 时有效
gradient标签的属性:形状渐变颜色
android:angle : 整型。渐变的角度(度)。0 为从左到右,90 为从上到上。必须是 45 的倍数。默认值为 0。
android:centerX : 浮点型。渐变颜色的位置 (0 – 1.0)。
android:centerY : 浮点型。渐变颜色的位置 (0 – 1.0)。
android:centerColor :颜色。起始颜色与结束颜色之间的可选颜色
android:endColor : 颜色。结束颜色
android:gradientRadius : 浮点型。渐变的半径。仅在 android:type=\”radial\” 时适用。
android:startColor : 颜色。起始颜色
android:type :要应用的渐变图案的类型
linear :线性渐变。这是默认值
radial : 径向渐变。起始颜色为中心颜色。
sweep : 流线型渐变
动态创建GradientDrawable并使用:
用shape标签定义的xml,最终都会转化为GradientDrawable对象,所以创建GradientDrawable对象和定义shape文件是一样的
//创建GradientDrawable
GradientDrawable gd = new GradientDrawable();
//对应形状
gd.setShape(GradientDrawable.RING);
//对应内部填充颜色
gd.setColor(Color.parseColor(\”#FFFF0000\”));
//对应圆角
gd.setCornerRadius(5);
//对应xml的stroke
gd.setStroke(3, Color.parseColor(\”#FFFF0000\”));
//给某个view使用
view.setBackgroundDrawable(gd);//如果要设置渐变颜色,方法一
int colors[] = { 0xff255779 , 0xff3e7492, 0xffa6c0cd };//分别为开始颜色,中间夜色,结束颜色
GradientDrawable gradientDrawable = new GradientDrawable(GradientDrawable.Orientation.TOP_BOTTOM, colors);
//设置中间渐变颜色的位置
gradientDrawable.setGradientCenter(1,2);
//渐变type
gradientDrawable.setGradientType(GradientDrawable.SWEEP_GRADIENT);
//动态改变GradientDrawable的属性
GradientDrawable drawable =(GradientDrawable)view.getBackground();
drawable.setColor(fillColor); // 设置填充色
drawable.setStroke(strokeWidth, strokeColor); // 设置边框宽度和颜色
drawable.setColors(colors); // 设置渐变颜色数组
把资源文件转换成Java对象:
GradientDrawable d = (GradientDrawable) context.getResources().getDrawable(R.drawable.loading_shape);
d.setColors(PublicLibraryStyle.colorThemes);
bindId(R.id.iv_loading).setBackground(d);
以上这篇android studio xml文件实现添加注释就是小编分享给大家的全部内容了,希望能给大家一个参考,也希望大家多多支持自学编程网。