本文实例为大家分享了Android table布局开发实现简单计算器的具体代码,供大家参考,具体内容如下
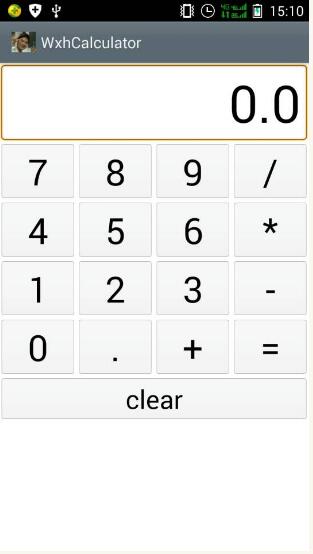
结果如图:
XML文件如下:
<FrameLayout xmlns:android=\"http://schemas.android.com/apk/res/android\"
xmlns:tools=\"http://schemas.android.com/tools\"
android:id=\"@+id/container\"
android:layout_width=\"match_parent\"
android:layout_height=\"match_parent\"
tools:context=\"com.example.wxhcalculator.MainActivity\"
tools:ignore=\"MergeRootFrame\" >

<TableLayout
android:layout_width=\"match_parent\"
android:layout_height=\"wrap_content\"
android:stretchColumns=\"1\"
android:textSize=\"42sp\" >

<TableRow>
<EditText
android:id=\"@+id/result\"
android:layout_width=\"fill_parent\"
android:layout_height=\"wrap_content\"
android:layout_span=\"4\"
android:background=\"@android:drawable/editbox_background\"
android:cursorVisible=\"false\"
android:editable=\"false\"
android:gravity=\"right|center_vertical\"
android:lines=\"1\"
android:textSize=\"60sp\" />
</TableRow>

<TableRow>

<LinearLayout
android:layout_width=\"fill_parent\"
android:layout_height=\"wrap_content\"
android:layout_weight=\"1\"
android:orientation=\"horizontal\"
android:textSize=\"42sp\" >

<Button
android:id=\"@+id/num7\"
android:layout_width=\"fill_parent\"
android:layout_height=\"wrap_content\"
android:layout_weight=\"1\"
android:text=\"7\"
android:textSize=\"42sp\" />

<Button
android:id=\"@+id/num8\"
android:layout_width=\"fill_parent\"
android:layout_height=\"wrap_content\"
android:layout_weight=\"1\"
android:text=\"8\"
android:textSize=\"42sp\" />

<Button
android:id=\"@+id/num9\"
android:layout_width=\"fill_parent\"
android:layout_height=\"wrap_content\"
android:layout_weight=\"1\"
android:text=\"9\"
android:textSize=\"42sp\" />

<Button
android:id=\"@+id/divide\"
android:layout_width=\"fill_parent\"
android:layout_height=\"wrap_content\"
android:layout_weight=\"1\"
android:text=\"/\"
android:textSize=\"42sp\" />
</LinearLayout>
</TableRow>

<TableRow>

<LinearLayout
android:layout_width=\"fill_parent\"
android:layout_height=\"wrap_content\"
android:layout_weight=\"1\"
android:orientation=\"horizontal\"
android:textSize=\"42sp\" >

<Button
android:id=\"@+id/num4\"
android:layout_width=\"fill_parent\"
android:layout_height=\"wrap_content\"
android:layout_weight=\"1\"
android:text=\"4\"
android:textSize=\"42sp\" />

<Button
android:id=\"@+id/num5\"
android:layout_width=\"fill_parent\"
android:layout_height=\"wrap_content\"
android:layout_weight=\"1\"
android:text=\"5\"
android:textSize=\"42sp\" />

<Button
android:id=\"@+id/num6\"
android:layout_width=\"fill_parent\"
android:layout_height=\"wrap_content\"
android:layout_weight=\"1\"
android:text=\"6\"
android:textSize=\"42sp\" />

<Button
android:id=\"@+id/multiply\"
android:layout_width=\"fill_parent\"
android:layout_height=\"wrap_content\"
android:layout_weight=\"1\"
android:text=\"*\"
android:textSize=\"42sp\" />
</LinearLayout>
</TableRow>

<TableRow>

<LinearLayout
android:layout_width=\"fill_parent\"
android:layout_height=\"wrap_content\"
android:layout_weight=\"1\"
android:orientation=\"horizontal\"
android:textSize=\"42sp\" >

<Button
android:id=\"@+id/num1\"
android:layout_width=\"fill_parent\"
android:layout_height=\"wrap_content\"
android:layout_weight=\"1\"
android:text=\"1\"
android:textSize=\"42sp\" />

<Button
android:id=\"@+id/num2\"
android:layout_width=\"fill_parent\"
android:layout_height=\"wrap_content\"
android:layout_weight=\"1\"
android:text=\"2\"
android:textSize=\"42sp\" />

<Button
android:id=\"@+id/num3\"
android:layout_width=\"fill_parent\"
android:layout_height=\"wrap_content\"
android:layout_weight=\"1\"
android:text=\"3\"
android:textSize=\"42sp\" />

<Button
android:id=\"@+id/subtract\"
android:layout_width=\"fill_parent\"
android:layout_height=\"wrap_content\"
android:layout_weight=\"1\"
android:text=\"-\"
android:textSize=\"42sp\" />
</LinearLayout>
</TableRow>

<TableRow>

<LinearLayout
android:layout_width=\"fill_parent\"
android:layout_height=\"wrap_content\"
android:layout_weight=\"1\"
android:orientation=\"horizontal\"
android:textSize=\"42sp\" >

<Button
android:id=\"@+id/num0\"
android:layout_width=\"fill_parent\"
android:layout_height=\"wrap_content\"
android:layout_weight=\"1\"
android:text=\"0\"
android:textSize=\"42sp\" />

<Button
android:id=\"@+id/point\"
android:layout_width=\"fill_parent\"
android:layout_height=\"wrap_content\"
android:layout_weight=\"1\"
android:text=\".\"
android:textSize=\"42sp\" />

<Button
android:id=\"@+id/add\"
android:layout_width=\"fill_parent\"
android:layout_height=\"wrap_content\"
android:layout_weight=\"1\"
android:text=\"+\"
android:textSize=\"42sp\" />

<Button
android:id=\"@+id/equal\"
android:layout_width=\"fill_parent\"
android:layout_height=\"wrap_content\"
android:layout_weight=\"1\"
android:text=\"=\"
android:textSize=\"42sp\" />
</LinearLayout>
</TableRow>

<TableRow>

<Button
android:id=\"@+id/clear\"
android:layout_width=\"fill_parent\"
android:layout_height=\"wrap_content\"
android:layout_span=\"4\"
android:gravity=\"center_vertical|center_horizontal\"
android:text=\"clear\"
android:textSize=\"30sp\" />
</TableRow>
</TableLayout>

</FrameLayout>
mainActivity主函数如下:
package com.example.wxhcalculator;

import android.support.v7.app.ActionBarActivity;
import android.os.Bundle;
import android.view.View;
import android.view.View.OnClickListener;
import android.widget.Button;
import android.widget.EditText;

public class MainActivity extends ActionBarActivity {
private Button[] btnNum = new Button[11];// 数值按钮
private Button[] btnCommand = new Button[5];// 符号按钮
private EditText editText = null;// 显示区域
private Button btnClear = null; // clear按钮
private String lastCommand; // 用于保存运算符
private boolean clearFlag; // 用于判断是否清空显示区域的值,true需要,false不需要
private boolean firstFlag; // 用于判断是否是首次输入,true首次,false不是首次
private double result; // 计算结果

public MainActivity() {
// 初始化各项值
result = 0; // x的值
firstFlag = true; // 是首次运算
clearFlag = false; // 不需要清空
lastCommand = \"=\"; // 运算符
}
@Override
protected void onCreate(Bundle savedInstanceState) {
super.onCreate(savedInstanceState);
setContentView(R.layout.activity_main);
// 获取运算符
btnCommand[0] = (Button) findViewById(R.id.add);
btnCommand[1] = (Button) findViewById(R.id.subtract);
btnCommand[2] = (Button) findViewById(R.id.multiply);
btnCommand[3] = (Button) findViewById(R.id.divide);
btnCommand[4] = (Button) findViewById(R.id.equal);
// 获取数字
btnNum[0] = (Button) findViewById(R.id.num0);
btnNum[1] = (Button) findViewById(R.id.num1);
btnNum[2] = (Button) findViewById(R.id.num2);
btnNum[3] = (Button) findViewById(R.id.num3);
btnNum[4] = (Button) findViewById(R.id.num4);
btnNum[5] = (Button) findViewById(R.id.num5);
btnNum[6] = (Button) findViewById(R.id.num6);
btnNum[7] = (Button) findViewById(R.id.num7);
btnNum[8] = (Button) findViewById(R.id.num8);
btnNum[9] = (Button) findViewById(R.id.num9);
btnNum[10] = (Button) findViewById(R.id.point);
// 初始化显示结果区域
editText = (EditText) findViewById(R.id.result);
editText.setText(\"0.0\");
// 实例化监听器对象
NumberAction na = new NumberAction();
CommandAction ca = new CommandAction();
for (Button bc : btnCommand) {
bc.setOnClickListener(ca);
}
for (Button bc : btnNum) {
bc.setOnClickListener(na);
}
// clear按钮的动作
btnClear = (Button) findViewById(R.id.clear);
btnClear.setOnClickListener(new View.OnClickListener() {
@Override
public void onClick(View view) {
editText.setText(\"0.0\");
// 初始化各项值
result = 0; // x的值
firstFlag = true; // 是首次运算
clearFlag = false; // 不需要清空
lastCommand = \"=\"; // 运算符
}
});
}
// 数字按钮监听器
private class NumberAction implements OnClickListener {
@Override
public void onClick(View view) {
Button btn = (Button) view;
String input = btn.getText().toString();
if (firstFlag) { // 首次输入
// 一上就\".\",就什么也不做
if (input.equals(\".\")) {
return;
}
// 如果是\"0.0\"的话,就清空
if (editText.getText().toString().equals(\"0.0\")) {
editText.setText(\"\");
}
firstFlag = false;// 改变是否首次输入的标记值
} else {
String editTextStr = editText.getText().toString();
// 判断显示区域的值里面是否已经有\".\",如果有,输入的又是\".\",就什么都不做
if (editTextStr.indexOf(\".\") != -1 && input.equals(\".\")) {
return;
}
// 判断显示区域的值里面只有\"-\",输入的又是\".\",就什么都不做
if (editTextStr.equals(\"-\") && input.equals(\".\")) {
return;
}
// 判断显示区域的值如果是\"0\",输入的不是\".\",就什么也不做
if (editTextStr.equals(\"0\") && !input.equals(\".\")) {
return;
}
}
// 如果我点击了运算符以后,再输入数字的话,就要清空显示区域的值
if (clearFlag) {
editText.setText(\"\");
clearFlag = false;// 还原初始值,不需要清空
}
editText.setText(editText.getText().toString() + input);// 设置显示区域的值
}
}

// 符号按钮监听器
private class CommandAction implements OnClickListener {
@Override
public void onClick(View view) {
Button btn = (Button) view;
String inputCommand = (String) btn.getText();
if (firstFlag) {// 首次输入\"-\"的情况
if (inputCommand.equals(\"-\")) {
editText.setText(\"-\");// 显示区域的内容设置为\"-\"
firstFlag = false;// 改变首次输入的标记
}
} else {
if (!clearFlag) {// 如果flag=false不需要清空显示区的值,就调用方法计算
calculate(Double.parseDouble(editText.getText().toString()));// 保存显示区域的值,并计算
}
// 保存你点击的运算符
lastCommand = inputCommand;
clearFlag = true;// 因为我这里已经输入过运算符,
}
}
}

// 计算用的方法
private void calculate(double x) {
if (lastCommand.equals(\"+\")) {
result += x;
} else if (lastCommand.equals(\"-\")) {
result -= x;
} else if (lastCommand.equals(\"*\")) {
result *= x;
} else if (lastCommand.equals(\"/\")) {
result /= x;
} else if (lastCommand.equals(\"=\")) {
result = x;
}
editText.setText(\"\" + result);
}

}
更多计算器功能实现,请点击专题: 计算器功能汇总 进行学习
关于Android计算器功能的实现,查看专题:Android计算器 进行学习。
以上就是本文的全部内容,希望对大家的学习有所帮助,也希望大家多多支持自学编程网。