本文实例为大家分享了利用python和OpenCV实现图像拼接,供大家参考,具体内容如下
python+OpenCV实现image stitching
在最新的OpenCV官方文档中可以找到C++版本的Stitcher类的说明, 但是python版本的还没有及时更新, 本篇对python版本的实现做一个简单的介绍.
由于官方文档中还没有python版本的Stitcher类的说明, 因此只能自己去GitHub源码上找, 以下是stitching的样例:
from __future__ import print_function
import cv2 as cv
import numpy as np
import argparse
import sys

modes = (cv.Stitcher_PANORAMA, cv.Stitcher_SCANS)

parser = argparse.ArgumentParser(description=\'Stitching sample.\')
parser.add_argument(\'--mode\',
 type = int, choices = modes, default = cv.Stitcher_PANORAMA,
 help = \'Determines configuration of stitcher. The default is `PANORAMA` (%d), \'
   \'mode suitable for creating photo panoramas. Option `SCANS` (%d) is suitable \'
   \'for stitching materials under affine transformation, such as scans.\' % modes)
parser.add_argument(\'--output\', default = \'result.jpg\',
 help = \'Resulting image. The default is `result.jpg`.\')
parser.add_argument(\'img\', nargs=\'+\', help = \'input images\')
args = parser.parse_args()

# read input images
imgs = []
for img_name in args.img:
 img = cv.imread(img_name)
 if img is None:
  print(\"can\'t read image \" + img_name)
  sys.exit(-1)
 imgs.append(img)

stitcher = cv.Stitcher.create(args.mode)
status, pano = stitcher.stitch(imgs)

if status != cv.Stitcher_OK:
 print(\"Can\'t stitch images, error code = %d\" % status)
 sys.exit(-1)

cv.imwrite(args.output, pano);
print(\"stitching completed successfully. %s saved!\" % args.output)
上面写了一大堆, 然鹅, 直接拿来用的话, 用下面的代码可以了, 简单粗暴
import numpy as np
import cv2
from cv2 import Stitcher

if __name__ == \"__main__\":
 img1 = cv2.imread(\'1.jpg\')
 img2 = cv2.imread(\'2.jpg\')
 stitcher = cv2.createStitcher(False)
 #stitcher = cv2.Stitcher.create(cv2.Stitcher_PANORAMA), 根据不同的OpenCV版本来调用
 (_result, pano) = stitcher.stitch((img1, img2))
 cv2.imshow(\'pano\',pano)
 cv2.waitKey(0)
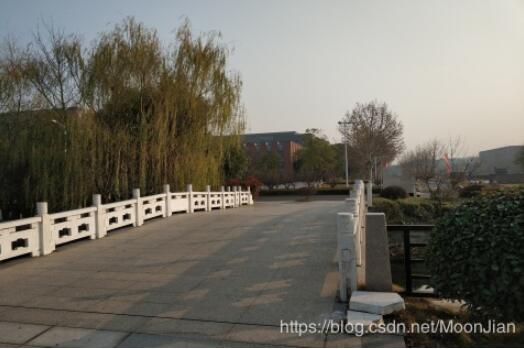
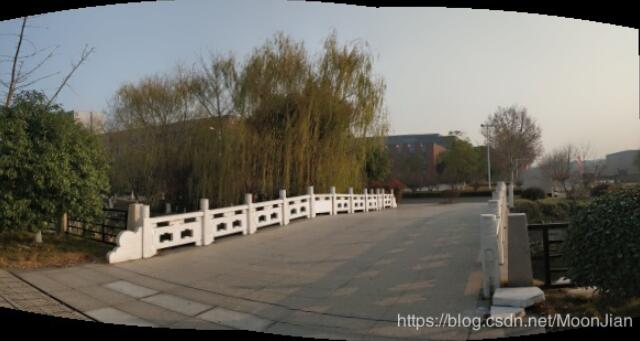
效果如下:
原图:

拼接后的图像:
以上就是本文的全部内容,希望对大家的学习有所帮助,也希望大家多多支持自学编程网。