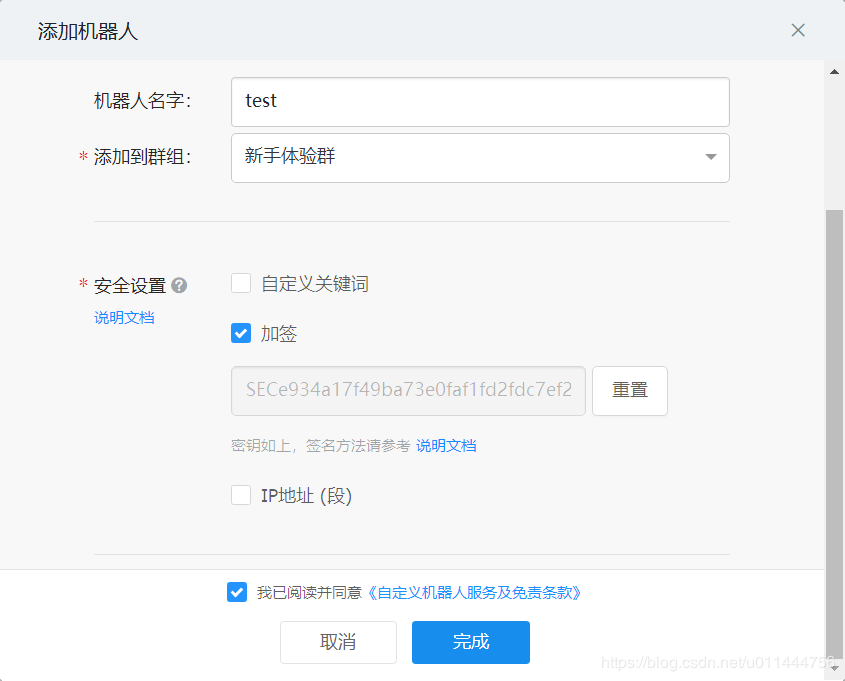
1.添加自定义机器人
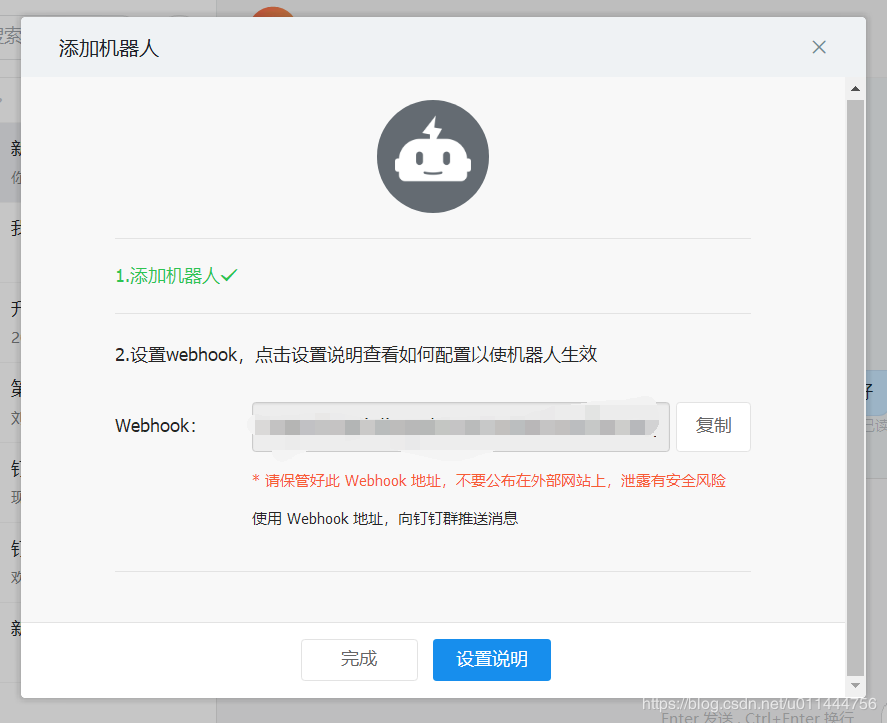
2.编写python代码请求钉钉机器人所给的webhook
钉钉自定义机器人官方文档
安全方式使用加签的方式:
第一步,把timestamp+\”\\n\”+密钥当做签名字符串,使用HmacSHA256算法计算签名,然后进行Base64 encode,最后再把签名参数再进行urlEncode,得到最终的签名(需要使用UTF-8字符集)。
|
参数 |
说明 |
|
timestamp |
当前时间戳,单位是毫秒,与请求调用时间误差不能超过1小时 |
|
secret |
密钥,机器人安全设置页面,加签一栏下面显示的SEC开头的字符串 |
import requests


#python 3.8
import time
import hmac
import hashlib
import base64
import urllib.parse

timestamp = str(round(time.time() * 1000))
secret = \'加签时生成的密钥\'
secret_enc = secret.encode(\'utf-8\')
string_to_sign = \'{}\\n{}\'.format(timestamp, secret)
string_to_sign_enc = string_to_sign.encode(\'utf-8\')
hmac_code = hmac.new(secret_enc, string_to_sign_enc, digestmod=hashlib.sha256).digest()
sign = urllib.parse.quote_plus(base64.b64encode(hmac_code))
print(timestamp)
print(sign)
第二步,把 timestamp和第一步得到的签名值拼接到URL中。
|
参数 |
说明 |
|
timestamp |
第一步使用到的时间戳 |
|
sign |
第一步得到的签名值 |
https://oapi.dingtalk.com/robot/send?access_token=XXXXXX×tamp=XXX&sign=XXX
第三步,发送请求
url=\'生成的Webhook×tamp={}&sign={}\'.format(timestamp, sign)
print (url)
headers={
\'Content-Type\':\'application/json\'
}
json={\"msgtype\": \"text\",
\"text\": {
\"content\": \"888\"
} }
resp=requests.post(url=url,headers=headers,json=json)
print (resp.text)
结果:

整体代码:
import requests
#python 3.8
import time
import hmac
import hashlib
import base64
import urllib.parse
timestamp = str(round(time.time() * 1000))
secret = \'加签时生成的密钥\'
secret_enc = secret.encode(\'utf-8\')
string_to_sign = \'{}\\n{}\'.format(timestamp, secret)
string_to_sign_enc = string_to_sign.encode(\'utf-8\')
hmac_code = hmac.new(secret_enc, string_to_sign_enc, digestmod=hashlib.sha256).digest()
sign = urllib.parse.quote_plus(base64.b64encode(hmac_code))
print(timestamp)
print(sign)
url=\'生成的Webhook×tamp={}&sign={}\'.format(timestamp, sign)
print (url)
headers={
\'Content-Type\':\'application/json\'
}
json={\"msgtype\": \"text\",
\"text\": {
\"content\": \"测试\"
} }
resp=requests.post(url=url,headers=headers,json=json)
print (resp.text)
到此这篇关于python使用自定义钉钉机器人的示例代码的文章就介绍到这了,更多相关python 自定义钉钉机器人内容请搜索自学编程网以前的文章或继续浏览下面的相关文章希望大家以后多多支持自学编程网!