本文实例为大家分享了Android实现布局全屏的具体代码,供大家参考,具体内容如下
前言
类似Launcher,希望占用的布局铺满全屏,以调整状态栏及虚拟按键部分的颜色样式。
废话不多说,上案例:
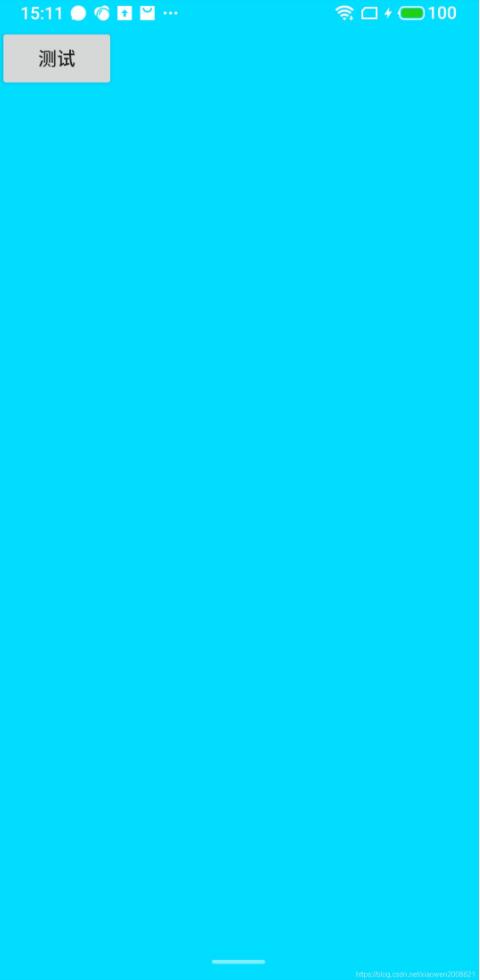
一、效果预览
二、案例实现
1.新建Android工程
2.styles样式增加
values 目录的styles.xml添加如下样式:
<style name=\"FullTheme\" parent=\"@style/BaseFullTheme\">
</style>
<style name=\"BaseFullTheme\" parent=\"@android:style/Theme.DeviceDefault.Light.NoActionBar\">
  <item name=\"android:windowBackground\">@android:color/transparent</item>
  <item name=\"android:colorBackgroundCacheHint\">@null</item>
  <item name=\"android:windowShowWallpaper\">true</item>
  <item name=\"android:windowNoTitle\">true</item>
</style>
alues-v19 目录的styles.xml添加如下样式:
<style name=\"FullTheme\" parent=\"@style/BaseFullTheme\">
  <item name=\"android:windowTranslucentStatus\">true</item>
  <item name=\"android:windowTranslucentNavigation\">true</item>
</style>
values-v21目录的styles.xml添加如下样式:
<style name=\"FullTheme\" parent=\"@style/BaseFullTheme\">
  <item name=\"android:windowTranslucentStatus\">false</item>
  <item name=\"android:windowTranslucentNavigation\">false</item>
  <item name=\"android:windowDrawsSystemBarBackgrounds\">true</item>
  <item name=\"android:statusBarColor\">#00000000</item>
  <item name=\"android:navigationBarColor\">#00000000</item>
</style>
values-v29目录的styles.xml添加如下样式:
<style name=\"FullTheme\" parent=\"@style/BaseFullTheme\">
  <item name=\"android:colorBackgroundCacheHint\">@null</item>
  <item name=\"android:colorEdgeEffect\">#FF757575</item>
  <item name=\"android:windowActionBar\">false</item>
  <item name=\"android:windowBackground\">@android:color/transparent</item>
  <item name=\"android:windowNoTitle\">true</item>
  <item name=\"android:windowShowWallpaper\">true</item>
  <item name=\"android:windowLayoutInDisplayCutoutMode\">shortEdges</item>
  <item name=\"android:enforceStatusBarContrast\">false</item>
  <item name=\"android:enforceNavigationBarContrast\">false</item>


  <item name=\"android:windowTranslucentStatus\">false</item>
  <item name=\"android:windowTranslucentNavigation\">false</item>
  <item name=\"android:windowDrawsSystemBarBackgrounds\">true</item>
  <item name=\"android:statusBarColor\">#00000000</item>
  <item name=\"android:navigationBarColor\">#00000000</item>
</style>
3.布局
layout目录建立activity_main.xml
<?xml version=\"1.0\" encoding=\"utf-8\"?>
<LinearLayout xmlns:android=\"http://schemas.android.com/apk/res/android\"
    xmlns:tools=\"http://schemas.android.com/tools\"
    android:layout_width=\"match_parent\"
    android:layout_height=\"match_parent\"
    android:orientation=\"vertical\"
    android:background=\"@android:color/holo_blue_bright\"<!-- 测试设置的颜色 -->
    android:fitsSystemWindows=\"true\"
    tools:context=\".MainActivity\">
    <Button
        android:id=\"@+id/test\"
        android:layout_width=\"wrap_content\"
        android:layout_height=\"wrap_content\"
        android:text=\"测试\"
        >
    </Button>
</LinearLayout>
4.使用
新建MainActivity.java
package com.demo;

import android.app.Activity;
import android.graphics.Color;
import android.os.Build;
import android.os.Bundle;
import android.view.View;
import android.view.Window;
import android.view.WindowManager;

public class MainActivity extends Activity {

    @Override
    protected void onCreate(Bundle savedInstanceState) {
        super.onCreate(savedInstanceState);
        hideStatusBarNavigationBar();
        setContentView(R.layout.activity_main);
    }

   //关键方法
    private void hideStatusBarNavigationBar() {
        if (Build.VERSION.SDK_INT >= Build.VERSION_CODES.LOLLIPOP) {
            Window window = getWindow();
            window.clearFlags(WindowManager.LayoutParams.FLAG_TRANSLUCENT_STATUS | WindowManager.LayoutParams.FLAG_TRANSLUCENT_NAVIGATION);
            window.getDecorView().setSystemUiVisibility(View.SYSTEM_UI_FLAG_LAYOUT_FULLSCREEN | View.SYSTEM_UI_FLAG_LAYOUT_HIDE_NAVIGATION | View.SYSTEM_UI_FLAG_LAYOUT_STABLE);
            window.addFlags(WindowManager.LayoutParams.FLAG_DRAWS_SYSTEM_BAR_BACKGROUNDS);
            window.setStatusBarColor(Color.TRANSPARENT);
            window.setNavigationBarColor(Color.TRANSPARENT);
            return;
        }
        if (Build.VERSION.SDK_INT >= Build.VERSION_CODES.KITKAT) {
            getWindow().addFlags( WindowManager.LayoutParams.FLAG_TRANSLUCENT_STATUS);
            getWindow().addFlags( WindowManager.LayoutParams.FLAG_TRANSLUCENT_NAVIGATION);

        }
    }
}
AndroidManifest.xml声明
<?xml version=\"1.0\" encoding=\"utf-8\"?>
<manifest xmlns:android=\"http://schemas.android.com/apk/res/android\"
    package=\"com.demo\">

    <application
        android:allowBackup=\"true\"
        android:icon=\"@mipmap/ic_launcher\"
        android:label=\"@string/app_name\"
        android:roundIcon=\"@mipmap/ic_launcher_round\"
        android:supportsRtl=\"true\"
        android:theme=\"@style/FullTheme\">
        <activity android:name=\".MainActivity\">
            <intent-filter>
                <action android:name=\"android.intent.action.MAIN\" />
                <category android:name=\"android.intent.category.LAUNCHER\" />
            </intent-filter>
        </activity>
    </application>

</manifest>
finish
三、填坑:fitsSystemWindows之坑
在activity_main.xml中的根布局那增加了android:fitsSystemWindows=“true”,如果不增加这个属性,子view的布局会从最顶上开始,有兴趣的可以修改了试试。
以上就是本文的全部内容,希望对大家的学习有所帮助,也希望大家多多支持自学编程网。