我们最近的项目中需要使用谷歌机器人验证,这个最主要的就是要有vpn,还需要有公司申请的google账号(自己申请的没用)用于商用的,利用这个账号去申请秘钥,然后有了秘钥之后就可以了。
部分代码如下:
1.首先正是我封装的google机器人验证组件:
<template>
    <div ref=\"grecaptcha\">
    </div>
    <!-- <div id=\"robot\"></div> -->

</template>
<script src=\"http://www.recaptcha.net/recaptcha/api.js?οnlοad=ReCaptchaLoaded&render=explicit&hl=en\" async defer></script>
<script>
export default {
  props: [\"sitekey\"], // 所要传的秘钥

  mounted() {
    window.ReCaptchaLoaded = this.loaded;
    var script = document.createElement(\"script\");
    script.src =
      \"https://recaptcha.net/recaptcha/api.js?οnlοad=ReCaptchaLoaded&render=explicit\";
    document.head.appendChild(script);
  },
  methods: {
    loaded() {
       window.grecaptcha.render(this.$refs.grecaptcha, {
        sitekey: this.sitekey,
        /**
        * res返回的是goole的验证情况,
        * 成功返回字符串
        * 失败不返回字符串
        * 所以根据字符串判断验证情况
        */
        callback: res => {// true  - 验证成功 // false - 验证失败

            res.length > 0 ? this.$emit(\"getValidateCode\", false) :  his.$emit(\"getValidateCode\", true)
        }
      });
      // grecaptcha.render(\'robot\', {
      //     sitekey: this.sitekey,
      //     /**
      //     * res返回的是goole的验证情况,
      //     * 成功返回字符串
      //     * 失败不返回字符串
      //     * 所以根据字符串判断验证情况
      //     */
      //     theme: \'light\', //主题颜色,有light与dark两个值可选
      //     size: \'normal\',//尺寸规则,有normal与compact两个值可选
      //     callback: res => {
      //         res.length > 0 ?  this.$emit(\"getValidateCode\", true) :  this.$emit(\"getValidateCode\", false)
      //         // true  - 验证成功 // false - 验证失败
      //     }
      // });

    }
  },
};
</script>
<style>

</style>
2.在需要的地方使用:
<template>
  <div>
    <div class=\"home-content\">
      <div class=\"home-content-img\">
        <!-- <div class=\"home-content-imgtop\"> -->
          <img src=\"../../assets/image/202010_JP NIGHT 店舗掲載営業用資料.002.png\" alt=\"\">
          <img src=\"../../assets/image/202010_JP NIGHT 店舗掲載営業用資料.003.png\" alt=\"\">
        <!-- </div> -->
        <!-- <div class=\"home-content-imgbottom\"> -->
          <img src=\"../../assets/image/202010_JP NIGHT 店舗掲載営業用資料.004.png\" alt=\"\">
          <img src=\"../../assets/image/202010_JP NIGHT 店舗掲載営業用資料.005.png\" alt=\"\">
        <!-- </div> -->
      </div>
      <div class=\"home-content-bottom\">
        <p> <a href=\"http://www.jp-night.com/terms.html\" rel=\"external nofollow\" >利用規約</a>· <a href=\"http://www.jp-night.com/privacy.html\" rel=\"external nofollow\" >プライバシ一ポリシ一</a>に同意の上 に同意の上でお進みください </p>
        <div class=\"content-google\">
          <google-recaptcha ref=\"recaptcha\" :sitekey=\"key\" @getValidateCode=\'getValidateCode\' v-model=\"validateCode\"></google-recaptcha>
        </div>
        <div class=\"login\">
          <button :class=\"isNext ?\'login-botton-background\':\'login-botton\'\" :disabled=\"isNext\" @click=\"login()\">店舗揭載を応募する</button>
        </div>
      </div>

    </div>
  </div>

</template>

<script>
import GoogleRecaptcha from \'../../common/module/GoogleRecaptcha\'
export default {
  data() {
    var checkCode = (rule, value, callback) => {
      if (value == false) {
        callback(new Error(\'请进行人机验证\'));
      } else {
        callback();
      }
    };
    return {
      key: \'6Ld9xxgaAAAAAI4xn7seMCmqbxIpVsJ_dwrZu9z1\',
      validateCode: false,
      isNext:false
    };
  },
  created(){

  },
  mounted(){

  },
  components:{
    GoogleRecaptcha
  },
  methods:{
    login(){
      sessionStorage.setItem(\'token\',true)

      this.$router.push({
        path: \"/shops\",
        query: { out: true }
      })
    },
    getValidateCode(value) {
      console.log(value);

      this.isNext = value
    },
  }
};
</script>

<style lang=\"scss\" scoped>
@import \"./css/pc.css\";
@import \"./css/ipad.css\";
@import \"./css/phone.css\";
#rc-anchor-container {
    width: 335px;
}

</style>
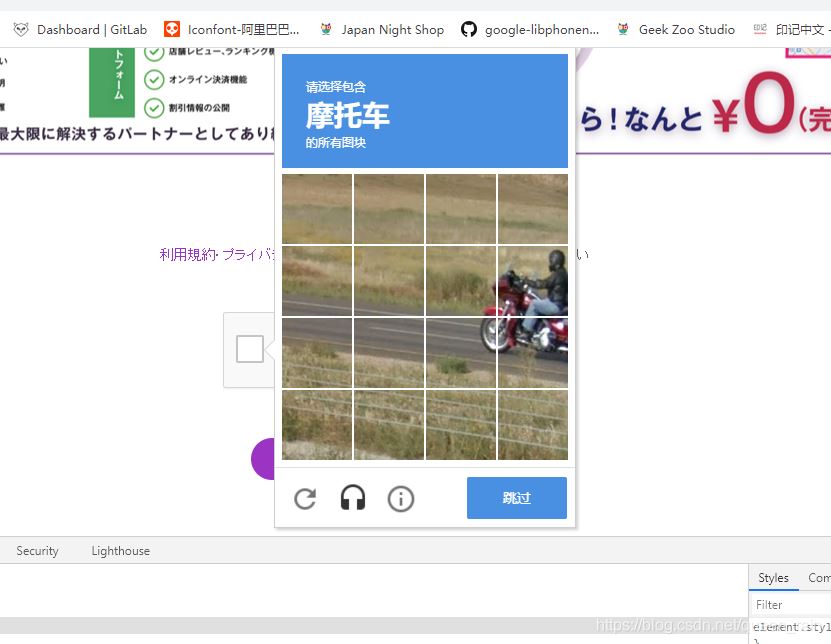
3.就完成啦,谷歌机器人就可以使用啦。
示意图:
到此这篇关于vue使用Google Recaptcha验证的实现示例的文章就介绍到这了,更多相关vue Google Recaptcha验证内容请搜索自学编程网以前的文章或继续浏览下面的相关文章希望大家以后多多支持自学编程网!