目的:通过Token,对API接口进行权限控制,避免:没有权限的用户直接通过接口获取数据。
本人在网上找了很多版本,不是太复杂就是不行。下面是我这边具体操作步骤(已验证可行):
1.安装依赖包
Microsoft.AspNetCore.Authentication.JwtBearer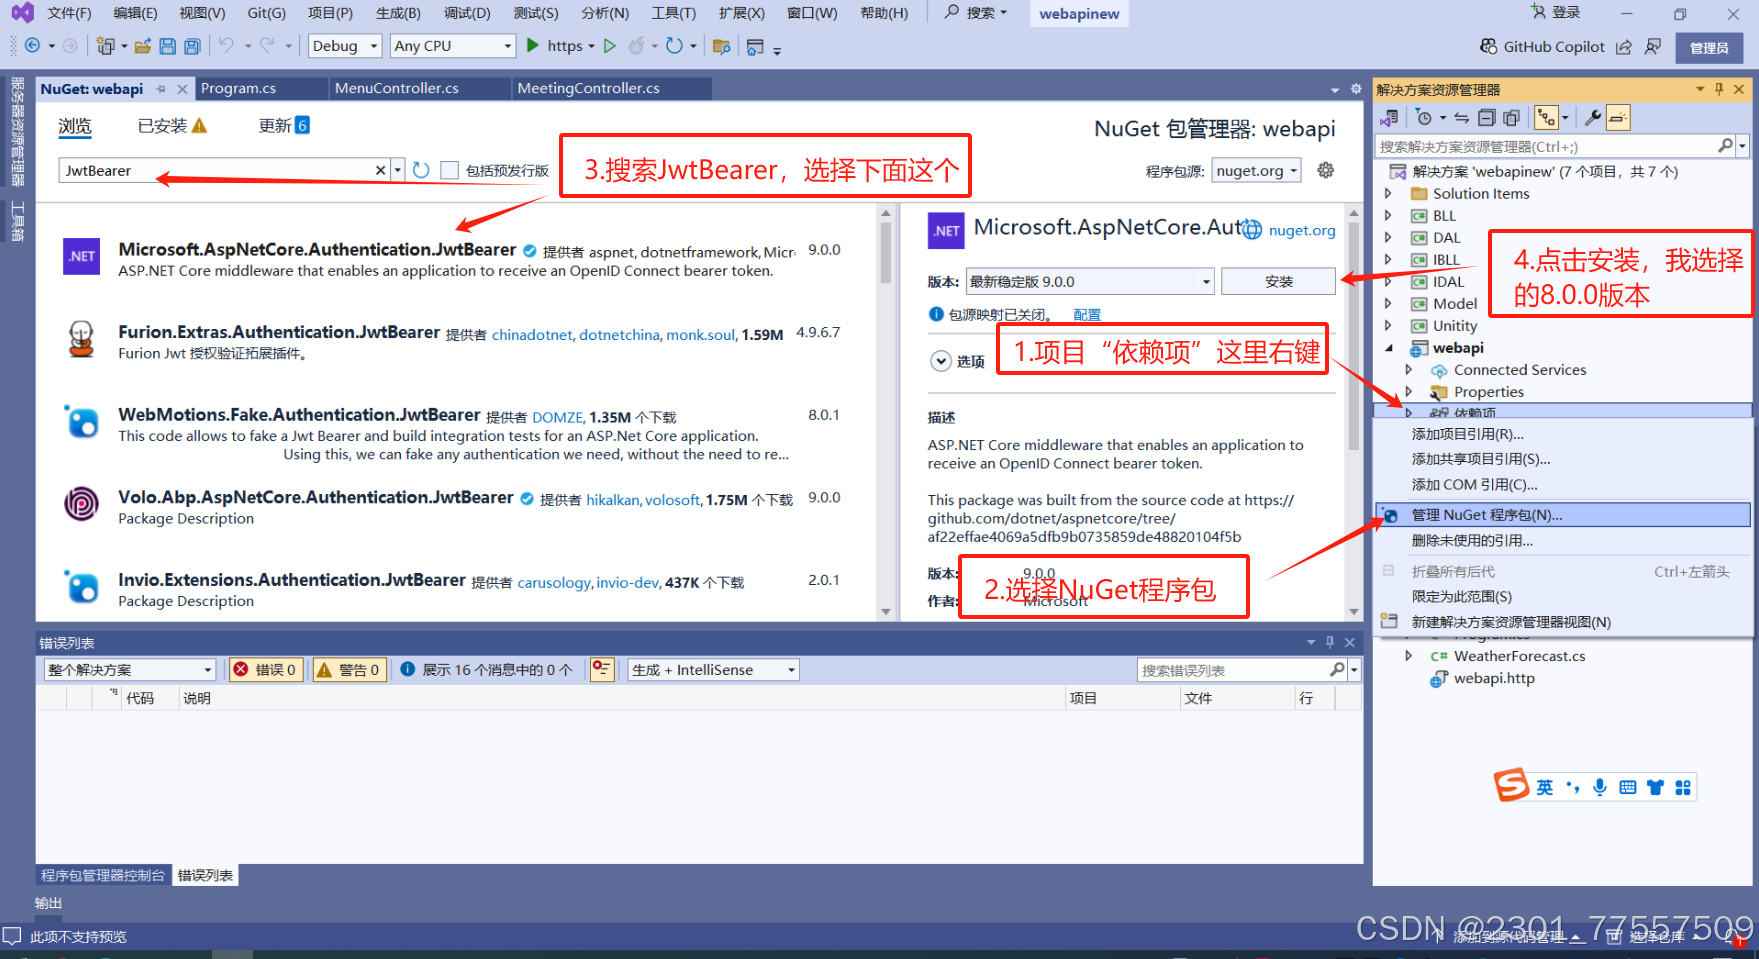
2.在appsettings.json中配置Token相关参数
在appsettings.json文件中增加下面代码,其中SecretKey弄复杂点,随意弄。
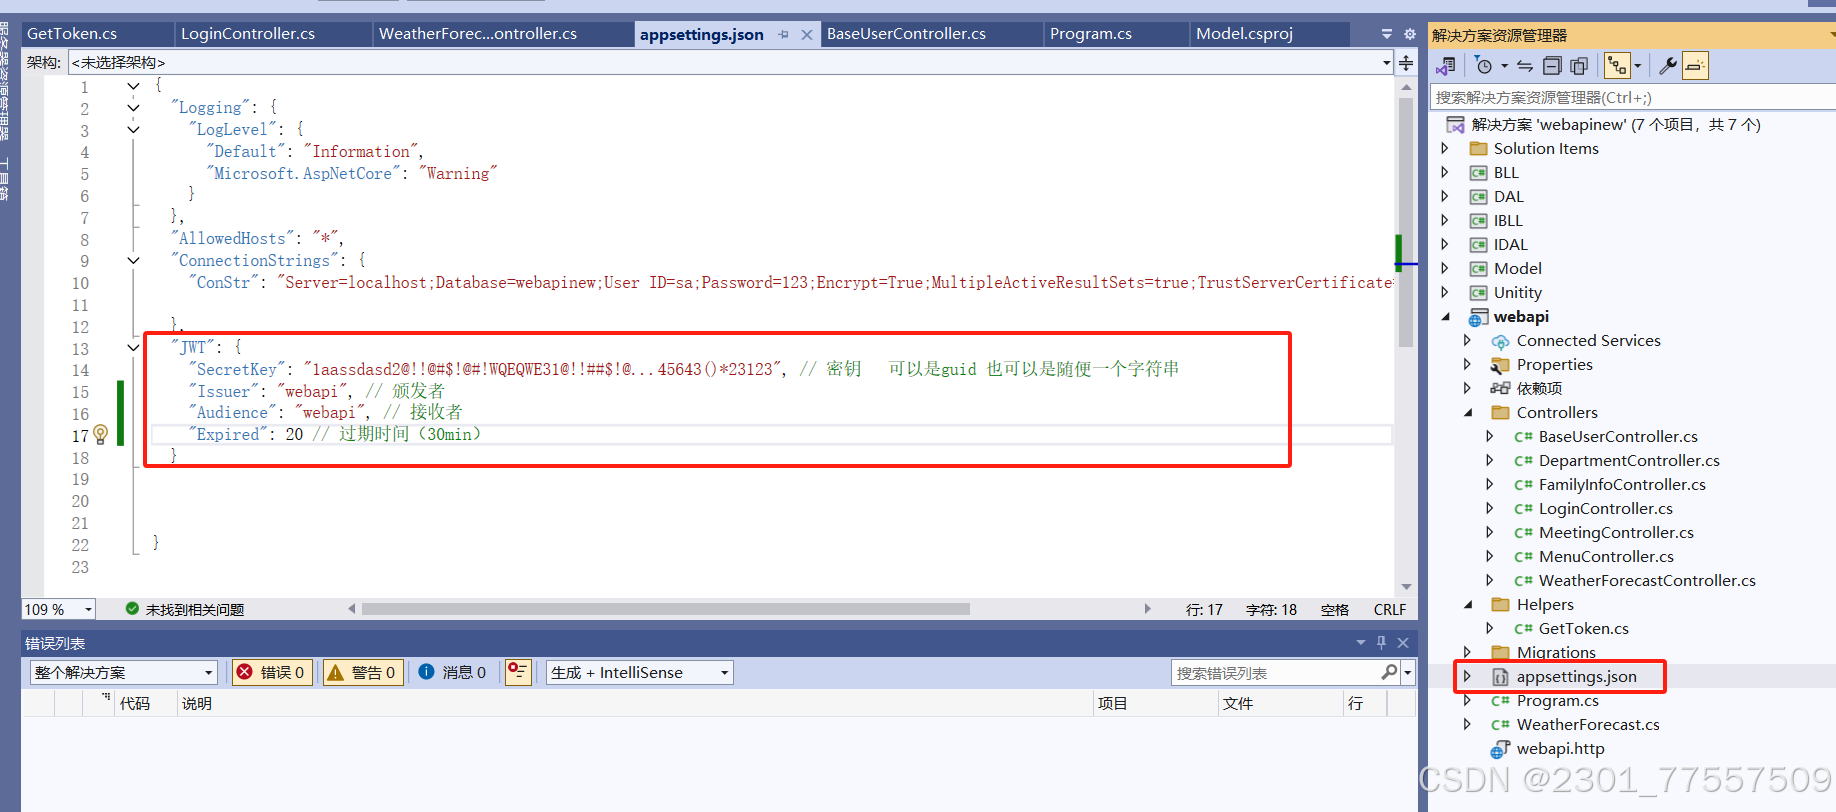
"JWT": {
"SecretKey": "1aassdasd2@!!@#$!@#!WQEQWE31@!!##$!@…45643()*23123", // 密钥 用于签名和验证令牌的密钥,需要保密
"Issuer": "webapi", // 颁发者
"Audience": "webapi", // 接收者
"Expired": 20 // 过期时间(30min)
}
3.配置program.cs
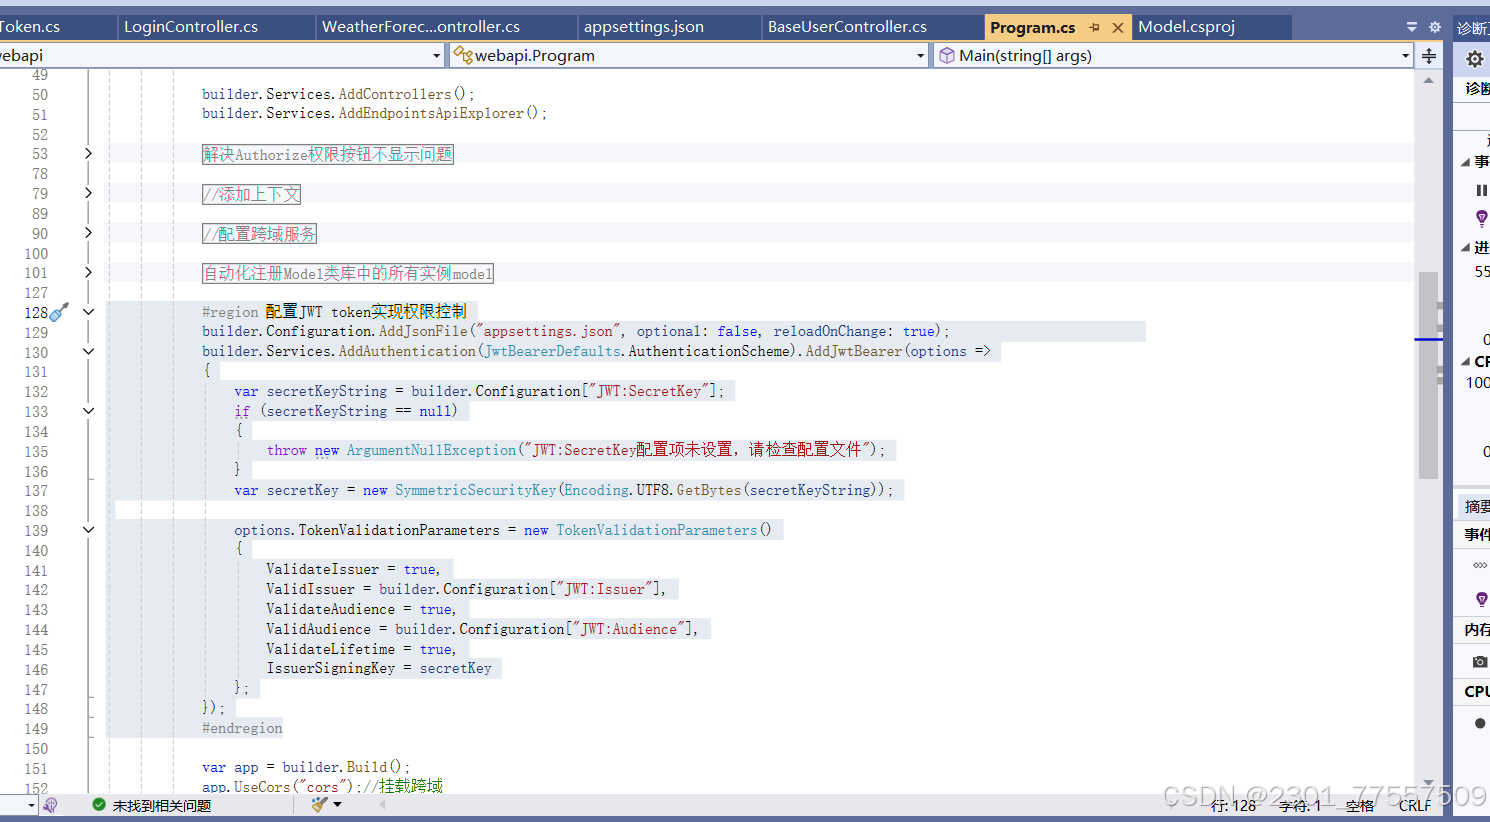
#region 配置JWT token实现权限控制
builder.Configuration.AddJsonFile("appsettings.json", optional: false, reloadOnChange: true);
builder.Services.AddAuthentication(JwtBearerDefaults.AuthenticationScheme).AddJwtBearer(options =>
{
var secretKeyString = builder.Configuration["JWT:SecretKey"];
if (secretKeyString == null)
{
throw new ArgumentNullException("JWT:SecretKey配置项未设置,请检查配置文件");
}
var secretKey = new SymmetricSecurityKey(Encoding.UTF8.GetBytes(secretKeyString));
options.TokenValidationParameters = new TokenValidationParameters()
{
ValidateIssuer = true,
ValidIssuer = builder.Configuration["JWT:Issuer"],
ValidateAudience = true,
ValidAudience = builder.Configuration["JWT:Audience"],
ValidateLifetime = true,
IssuerSigningKey = secretKey
};
});
#endregion
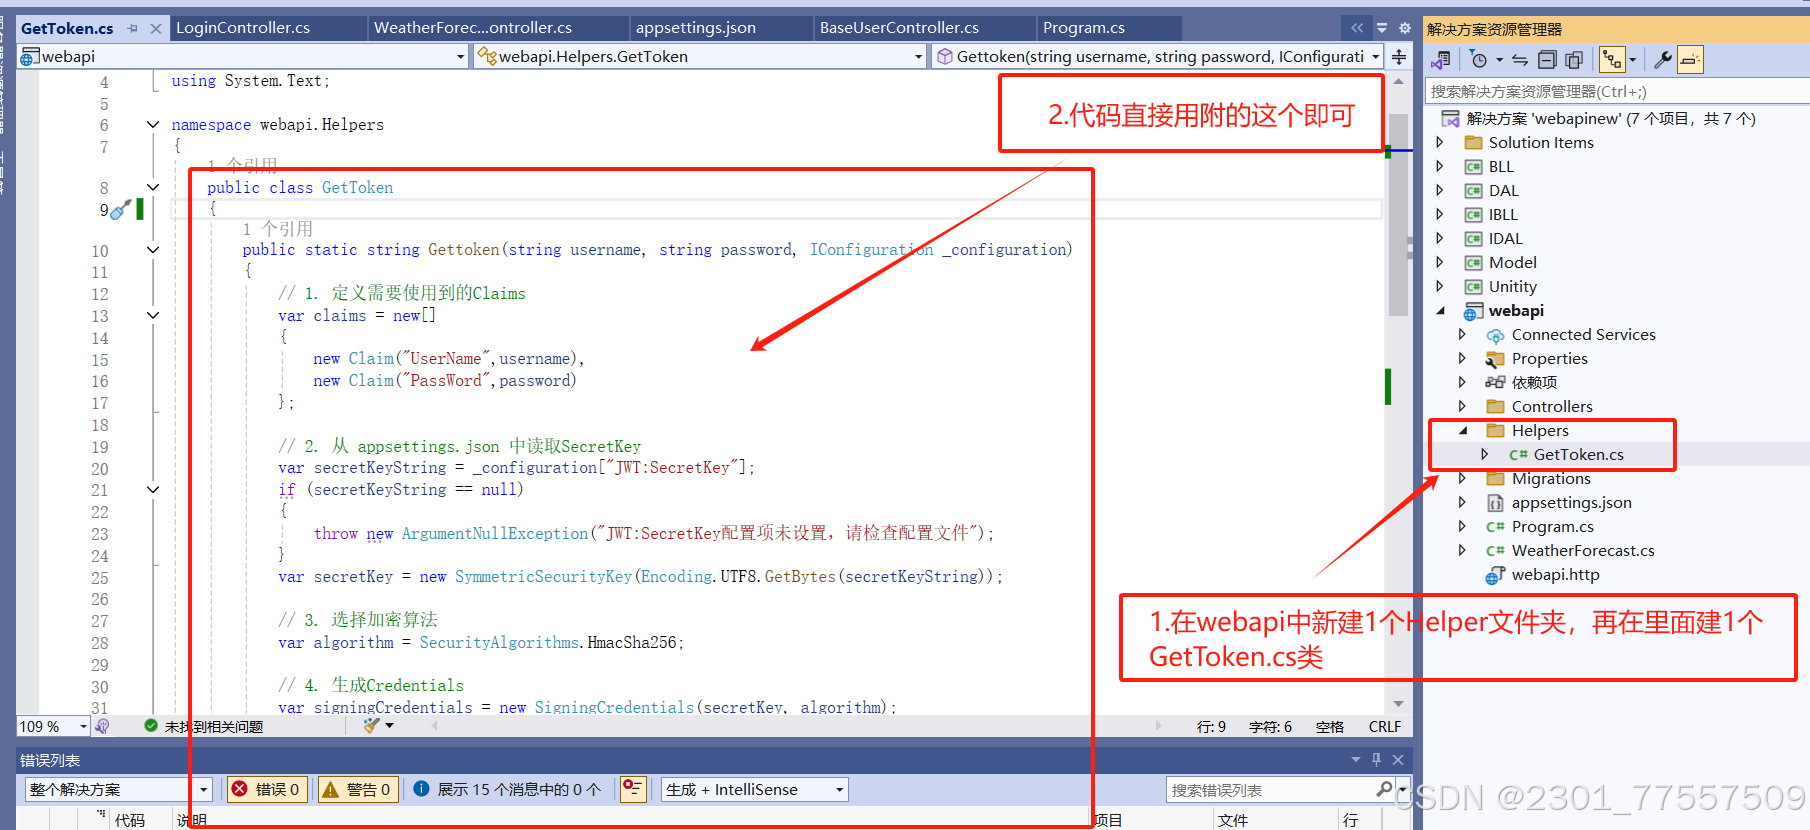
4.创建一个生成Token的类。
操作:在webapi中新建1个Helpers文件夹,文件夹里面建一个GetToken.cs类,
类里面写一个Gettoken方法,用于生成token串。api控制器通过调用这个方法来实现登陆成功后将生成的token返回前端。
注意:下面是Gettoken方法的参数。
username、password参数:是前端登陆时传给Login控制器、Login控制器校验登陆信息,成功后再调用Gettoken方法(调用生成token方法的时候将用户名、密码传过来)生成token返回给前端。username、password这两个参数也可以根据实际用一个model来实现(如果要用model来实现的话,注意在webapi引用model类库)。
_configuration参数:是Login控制器传过来,用于生成token时调用配置信息的。
生成token的方法及参数:public static string Gettoken(string username, string password, IConfiguration _configuration)
 GetToken.cs代码:
using Microsoft.IdentityModel.Tokens;
using System.IdentityModel.Tokens.Jwt;
using System.Security.Claims;
using System.Text;
namespace webapi.Helpers
{
public class GetToken
{
public static string Gettoken(string username, string password, IConfiguration _configuration)
{
// 1. 定义需要使用到的Claims
var claims = new[]
{
new Claim("UserName",username),
new Claim("PassWord",password)
};
// 2. 从 appsettings.json 中读取SecretKey
var secretKeyString = _configuration["JWT:SecretKey"];
if (secretKeyString == null)
{
throw new ArgumentNullException("JWT:SecretKey配置项未设置,请检查配置文件");
}
var secretKey = new SymmetricSecurityKey(Encoding.UTF8.GetBytes(secretKeyString));
// 3. 选择加密算法
var algorithm = SecurityAlgorithms.HmacSha256;
// 4. 生成Credentials
var signingCredentials = new SigningCredentials(secretKey, algorithm);
// 5. 从 appsettings.json 中读取Expires
var expires = Convert.ToDouble(_configuration["JWT:Expires"]);
// 6. 根据以上,生成token
var token = new JwtSecurityToken(
_configuration["JWT:Issuer"], //Issuer
_configuration["JWT:Audience"], //Audience
claims, //Claims,
DateTime.Now, //notBefore
DateTime.Now.AddMinutes(expires), //expires
signingCredentials //Credentials
);
// 7. 将token变为string
var jwtToken = new JwtSecurityTokenHandler().WriteToken(token);
return jwtToken;
}
}
}
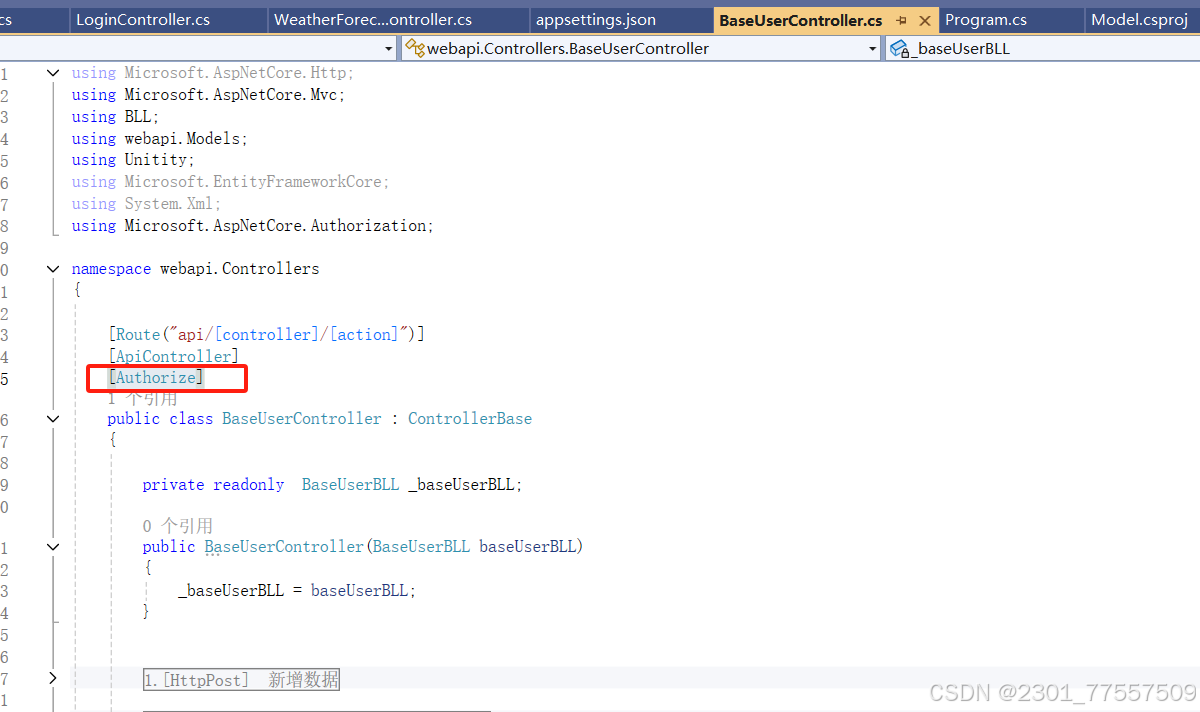
5.在需要用token串才能访问的控制器中加上[Authorize]关键字标识
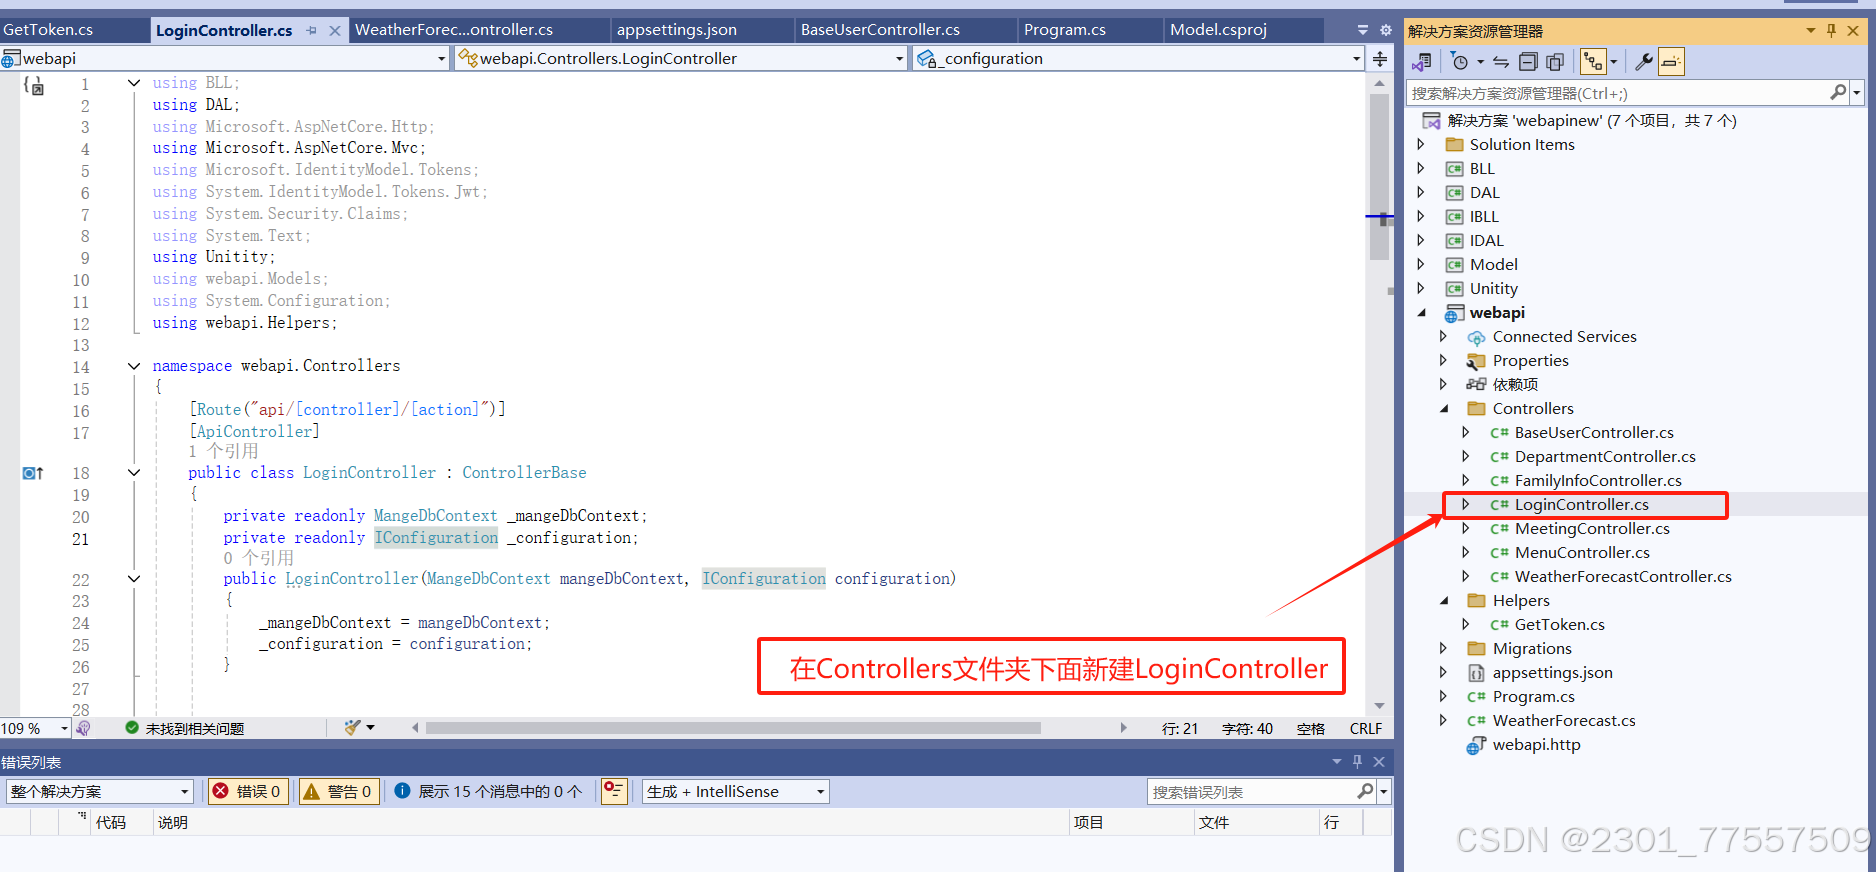
6.编写Login控制器,实现登陆验证并返回token给前端
using BLL;
using DAL;
using Microsoft.AspNetCore.Http;
using Microsoft.AspNetCore.Mvc;
using Microsoft.IdentityModel.Tokens;
using System.IdentityModel.Tokens.Jwt;
using System.Security.Claims;
using System.Text;
using Unitity;
using webapi.Models;
using System.Configuration;
using webapi.Helpers;
namespace webapi.Controllers
{
[Route("api/[controller]/[action]")]
[ApiController]
public class LoginController : ControllerBase
{
private readonly MangeDbContext _mangeDbContext;
private readonly IConfiguration _configuration;
public LoginController(MangeDbContext mangeDbContext, IConfiguration configuration)
{
_mangeDbContext = mangeDbContext;
_configuration = configuration;
}
#region 登陆验证并获取token
[HttpGet]
public ResponseMessage Login(string username, string password)
{
ResponseMessage responseMessage = new ResponseMessage();
try
{
var data = _mangeDbContext.BaseUsers.FirstOrDefault(p => p.UserName == username && p.PassWord==password);//这里校验登陆用户名和密码
if (data == null)
{
responseMessage.code = 404;
responseMessage.Data = null;
responseMessage.Message = "用户名或密码错误。";
}
else
{
responseMessage.code = 200;
//如果用户名和密码正确,就调用前面介绍的生成token的方法(将3个参数传递过去),生成的token串赋值给data,用于返回给前端
responseMessage.Data = GetToken.Gettoken(username, password, _configuration);
responseMessage.Message = "登陆成功";
}
}
catch (Exception ex)
{
responseMessage.code = 500;
responseMessage.Data = null;
responseMessage.Message = "查询所有用户失败:" + ex.Message;
}
return responseMessage;
}
#endregion
}
}
验证:
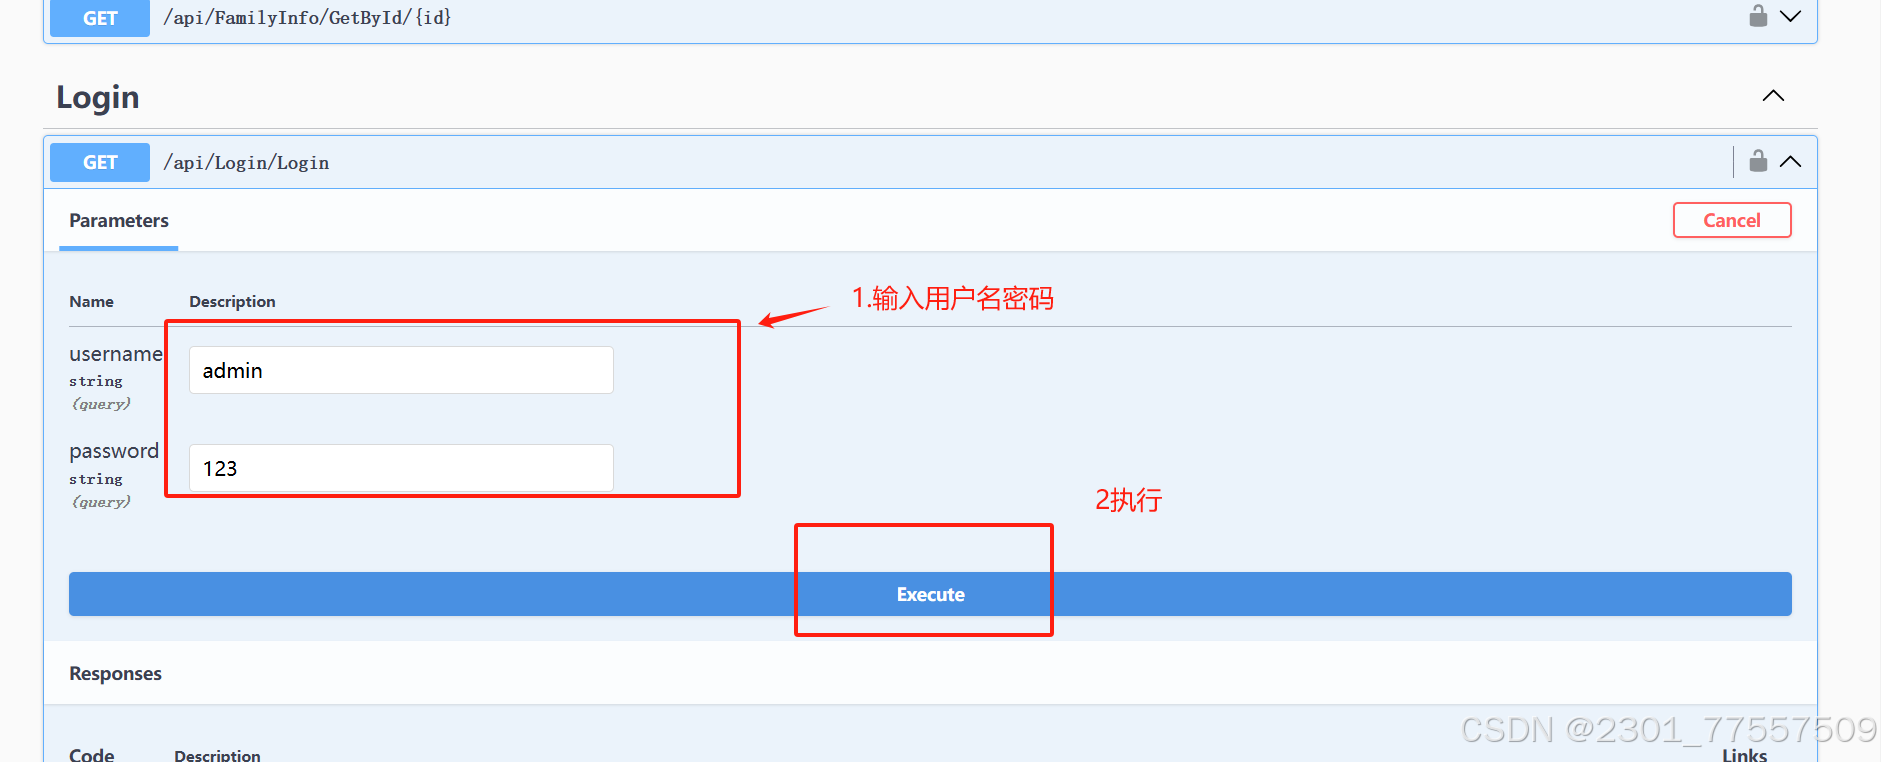
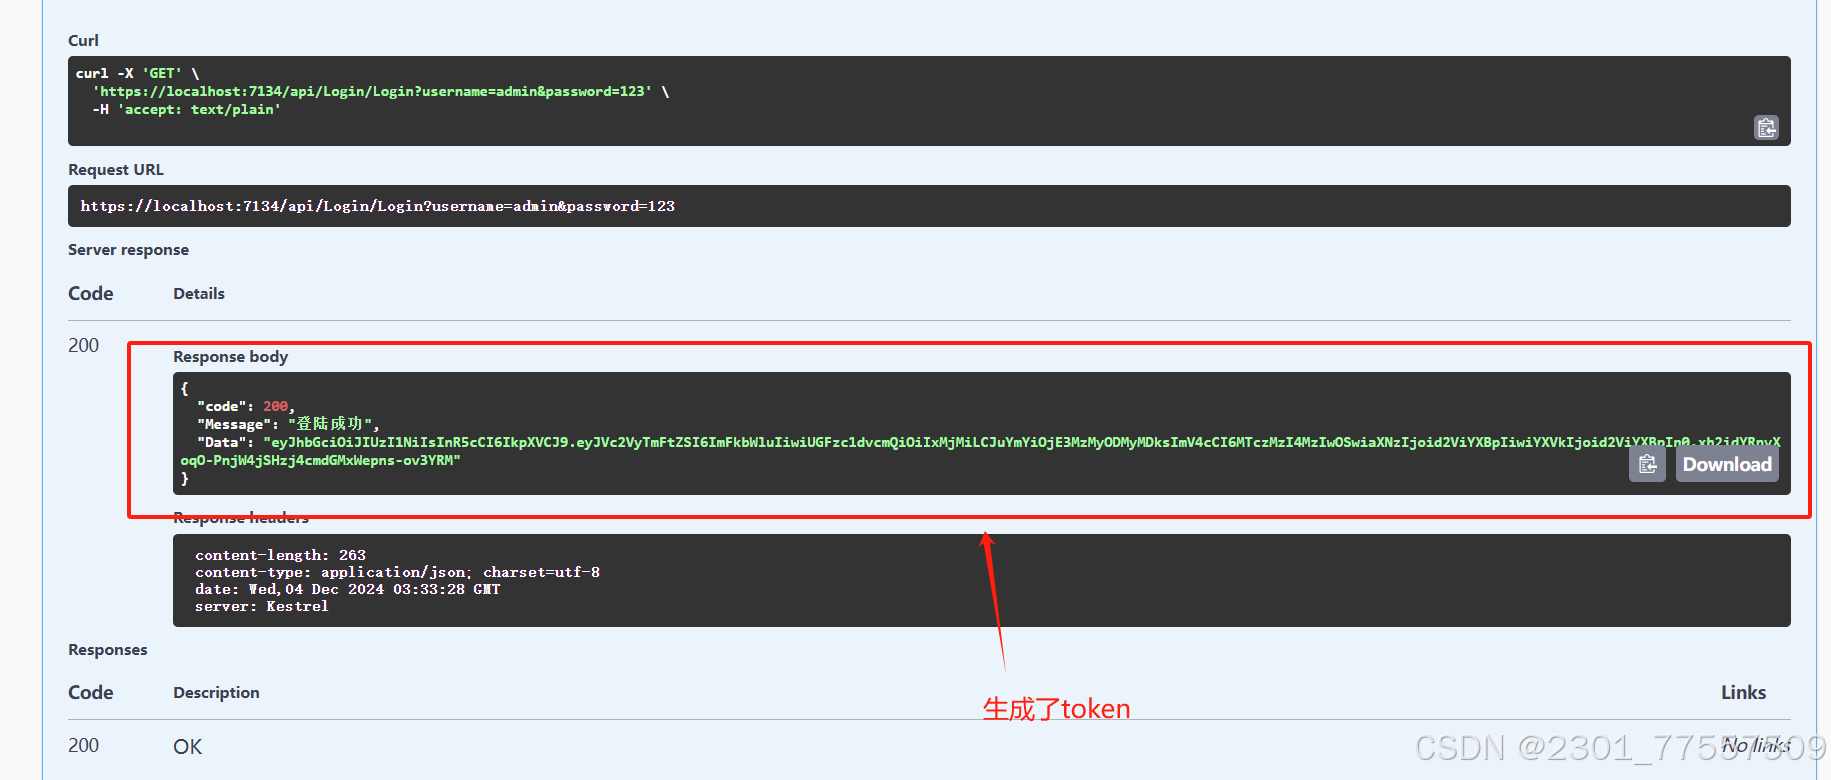
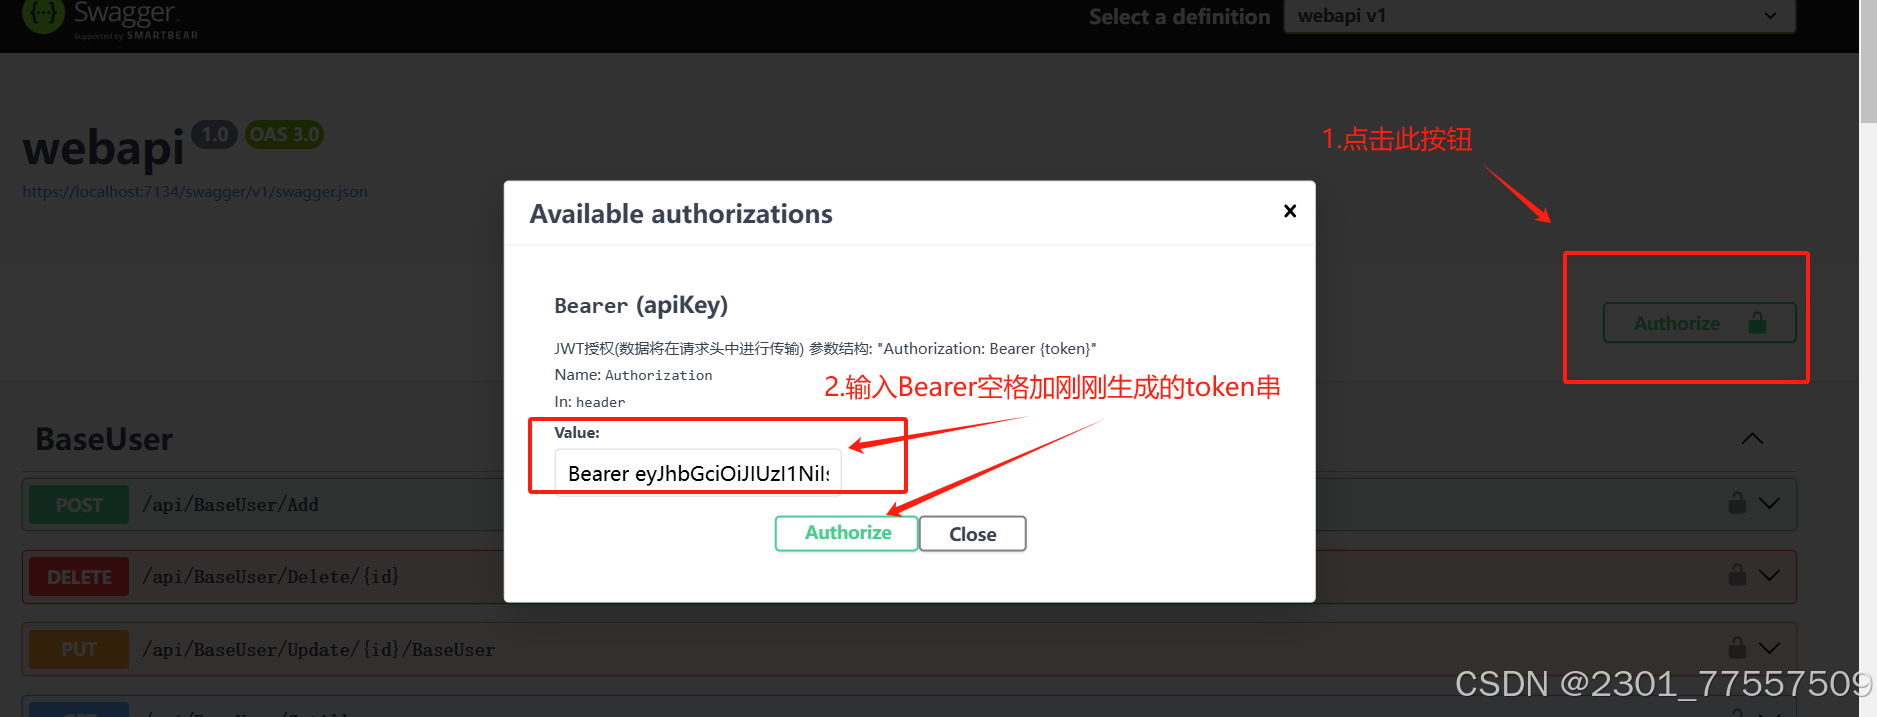
成功,现在去验证端口获取数据。

7.可能遇到问题
(1)swagger页面不显示[Authorize]按钮,如下:
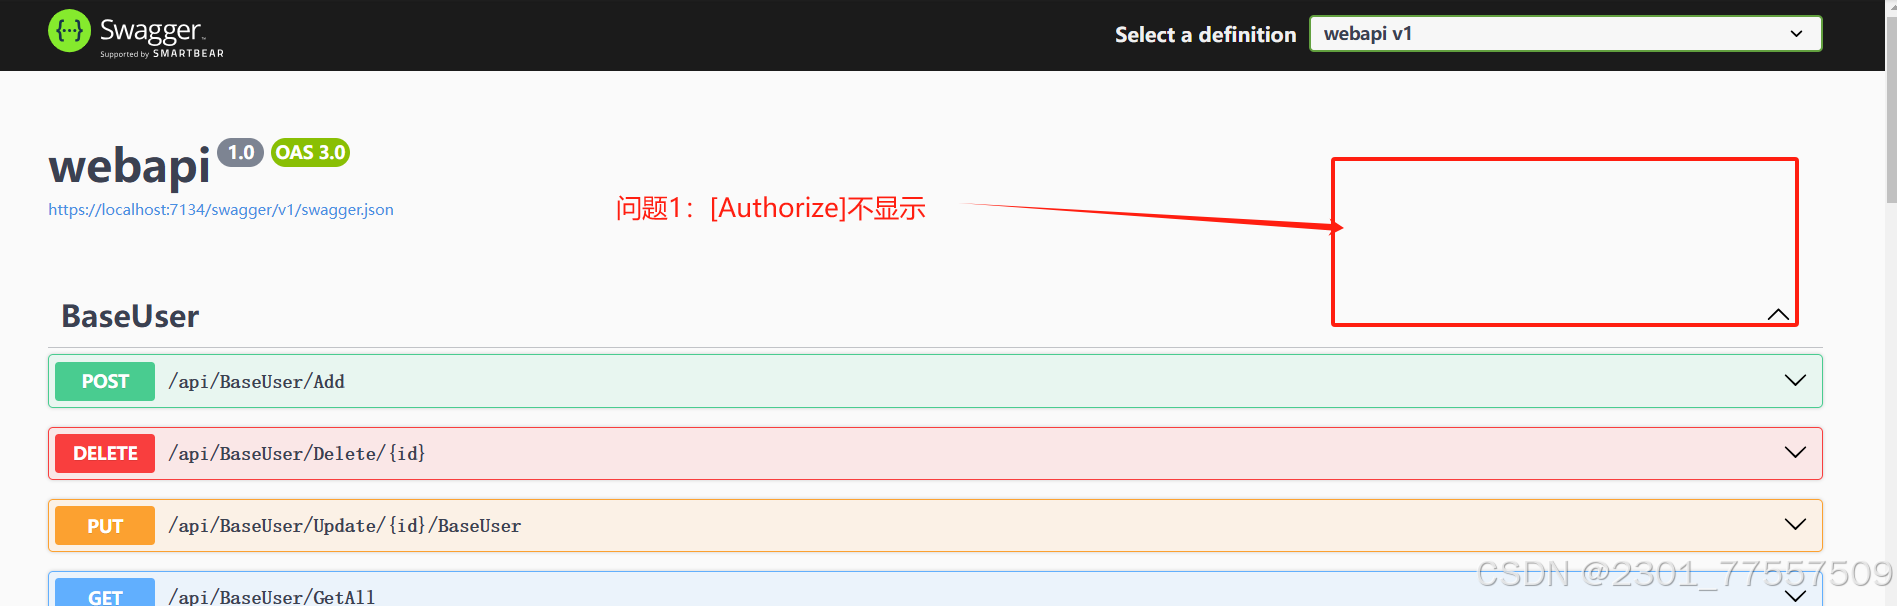
解决办法:在program.cs中的builder.Services.AddSwaggerGen()增加配置,具体代码如下:
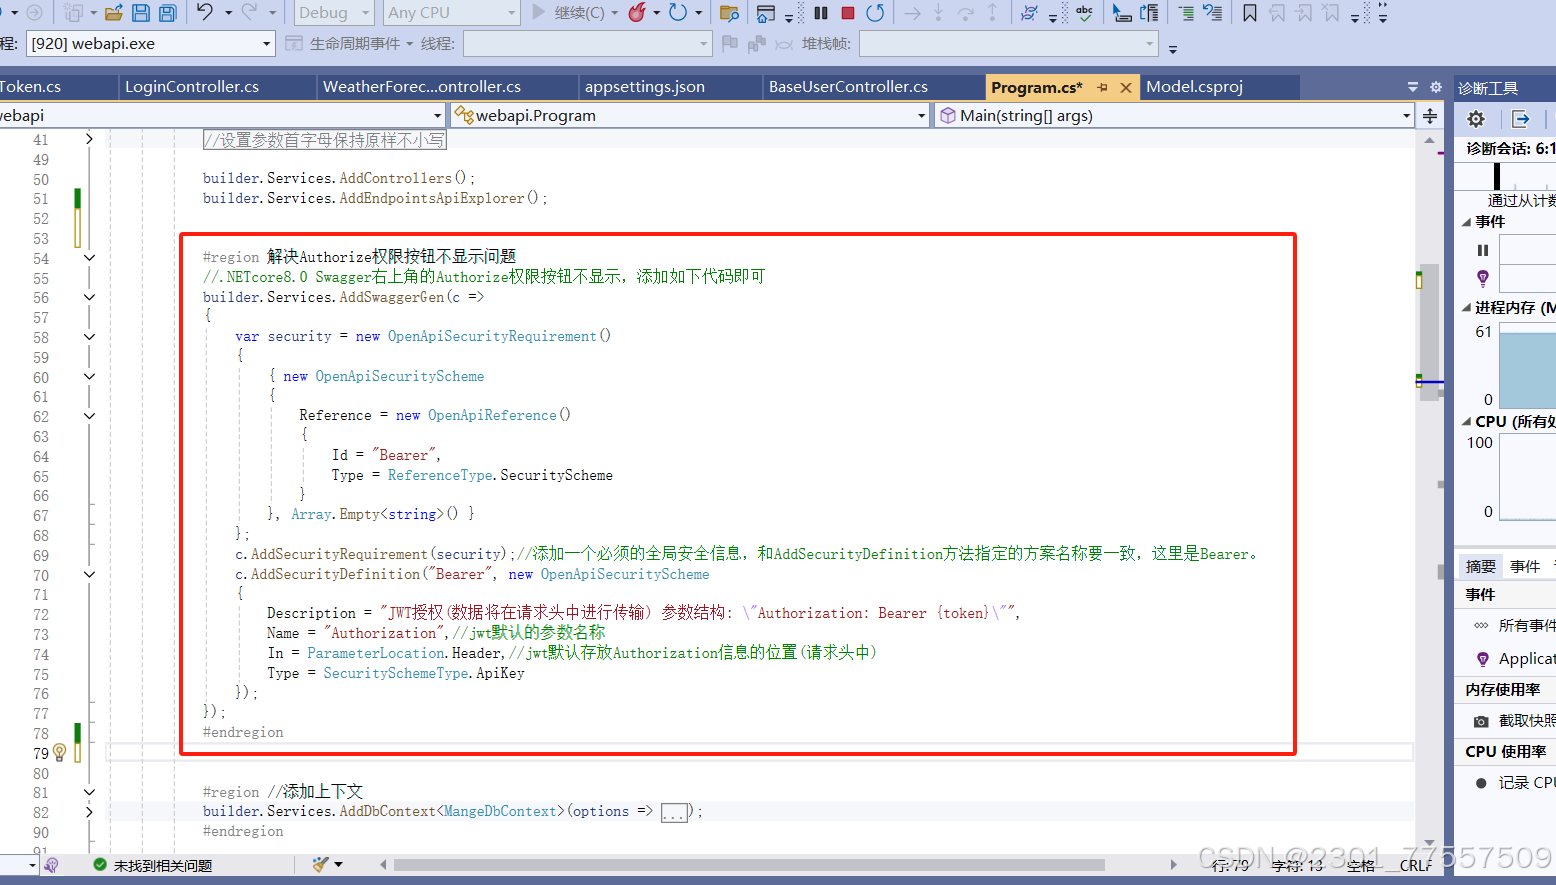
#region 解决Authorize权限按钮不显示问题
//.NETcore8.0 Swagger右上角的Authorize权限按钮不显示,添加如下代码即可
builder.Services.AddSwaggerGen(c =>
{
var security = new OpenApiSecurityRequirement()
{
{ new OpenApiSecurityScheme
{
Reference = new OpenApiReference()
{
Id = "Bearer",
Type = ReferenceType.SecurityScheme
}
}, Array.Empty<string>() }
};
c.AddSecurityRequirement(security);//添加一个必须的全局安全信息,和AddSecurityDefinition方法指定的方案名称要一致,这里是Bearer。
c.AddSecurityDefinition("Bearer", new OpenApiSecurityScheme
{
Description = "JWT授权(数据将在请求头中进行传输) 参数结构: \\"Authorization: Bearer {token}\\"",
Name = "Authorization",//jwt默认的参数名称
In = ParameterLocation.Header,//jwt默认存放Authorization信息的位置(请求头中)
Type = SecuritySchemeType.ApiKey
});
});
#endregion
平台声明:以上文章转载于《CSDN》,文章全部或者部分内容、文字的真实性、完整性、及时性本站不作任何保证或承诺,仅作参考。
版权声明:本文为博主原创文章,遵循 CC 4.0 BY-SA 版权协议,转载请附上原文出处链接和本声明。
原文链接:https://blog.csdn.net/2301_77557509/article/details/144185752